Valves and Valve Springs

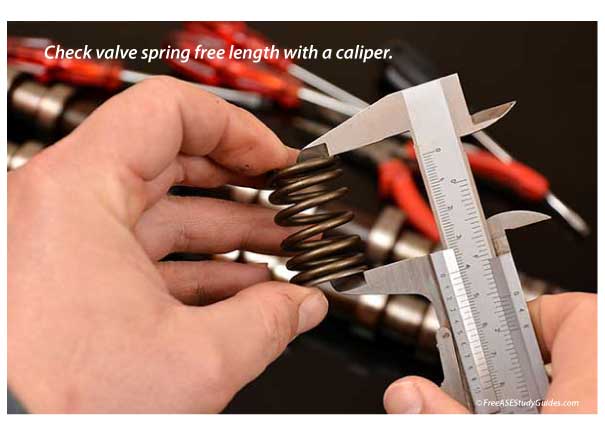
Check valve spring free length with a caliper, as shown in the illustration. Measure from the base or pocket in the head to the bottom of the retainer. If this height is excessive, add the appropriate shim to return the spring to its proper tension. Most manufacturers recommend replacing any short springs (~1/16 inch). Measure spring tension with a valve spring tester.
Valve Spring Squareness

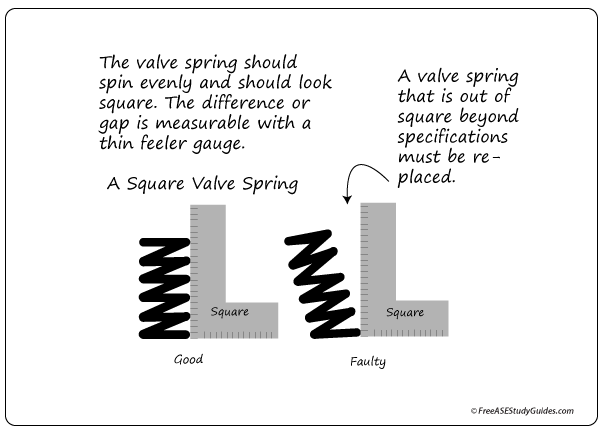
Use a square and a flat surface to check valve spring squareness. When placed on a flat surface, the springs should remain square. Rotate the valve and ensure all the coils contact the square when rotated. Use a feeler gauge to measure tolerance. Check the manufacturer's manual for any specifications or special procedures. Notice the space between the top coil and the square.
Valve Inspection

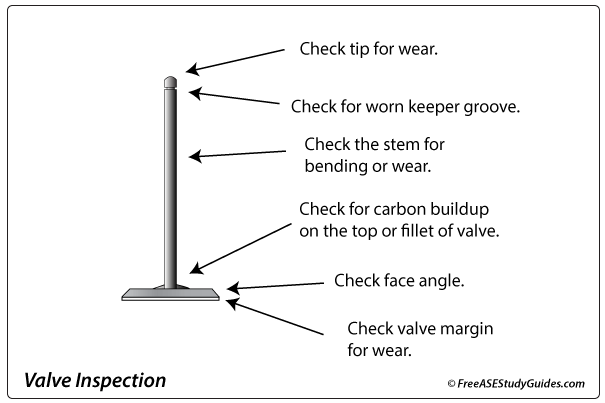
After removing the valve from the cylinder head, clean it, and inspect for:

No margin: The margin of the valve gets pounded. If the margin is too thin, the valve heats up and burns prematurely.
Pitting, Burning, and Cracks: This usually happens to exhaust valves because they run hotter than the intake valves. Made of high-quality stainless steel, they do not benefit from the fresh air /fuel charge the intake valve receives on the intake stroke. As the spring weakens, the valve sticks open longer. Valves burn when they are left open during combustion and exposed to extreme temperatures.
Cupped Heads: Replace the valve if the head is cupped or mushroomed.
Stretching: Stretching is the narrowing of the neck above the head, affecting the valve's length.
Worn Keeper Grooves or Valve Stem Tip: Inspect keeper grooves, rotators, and retainers for wear and replace if necessary. If a keeper or retainer pops out of place, the valve will drop in the cylinder, causing engine damage. Also, a worn valve stem tip can cause retainer and rocker arm damage.
Valve Stem: The valve stem should be measured with an outside micrometer in several places to check for uneven or excessive wear.